
Sunday 27 May 2012
Bradson Delay
Sorry for the delay on the new posts, but we have had a serious technology failure in the work shop and an overhaul so there, will the promised video and an update coming very very soon.
Sunday 13 May 2012
Bradson Pillar Drill No.29 Finishing off part 1
The piant is now done and I am on to the little details now. Finally it looks great and runs beautifully I am looking forward to this being finished. When restorations turn out this good I find it very hard to part with them!! Sadly I can't keep it, but I'm sure it's new owner will get a lifetimes worth of use out of it...


Not long now unit the Bradson is fully restored. (Spoiler) The next project is a Lister D stationary engine..
Bradson Pillar Drill No.29 Some Assembly Required
So it's now 01:09 and I have been in the workshop hours and just lost track of the time but here are the fruits of my labours.

I have assembled the drill and performed a functions test everything works great, the gear change is smooth and the action glides.

The drill is not finished yet but we are a little bit closer.


There is still some paint work to do and the brass plate need cleaning painting and replacing.
Home straight.
Saturday 12 May 2012
Bradson Pillar Drill No.29 Paint! Finally...
There have been some changes to the colour scheme! Originally we were going with blue but that has changed. After much research we discovered that was a few paint schemes for this model. So we are going with the Green red and gold one. It turns out these drills could be run off stationary engines so that's the plan!!


Because the red parts are handled the most we wanted to make sure that the paint wouldn't wear out quickly. So now the primer has dried and the second coat of red paint is on. We sanded between coats this is the final coat.

This is the first coat of green paint after the primer and there is much cleaning up to do!

The camera is making the paint look different colours (It is GREEN!!)

As before the large parts are painted in two halves. Assembly soon!!
Wednesday 9 May 2012
Bradson Pillar Drill No.29 Back In Business
The last week has been a trying time, but with the wife all better and Lenard back on form we have hit this project again. So with all the pieces cleaned up it's finally time to start paint...

This is Lenards comfort zone so he took the lead on the painting. We used a thick rust preventing primer because cast iron is very uneven, plus it oxidizes very quickly.

For this to work well and look great it's all in the prep work and attention to detail.

Initially we estimated three coats of primer but it looks like two will be more than enough.

We have made best effort to ensure no run off into the places we don't want paint but there is still some finishing to be done with a craft knife.

Due to the weight of these pieces we are painting them in two halves.


Just for a comparison here is a before and after.


So we really are on the home straight with this restoration and I'm hoping that it will look as good as it did the day it came out of the factory. It was originally machine blue with red and with this restoration we are going to honour that colour scheme.
Saturday 5 May 2012
Bradson Pillar Drill No.29 Workshop of little terrors!!
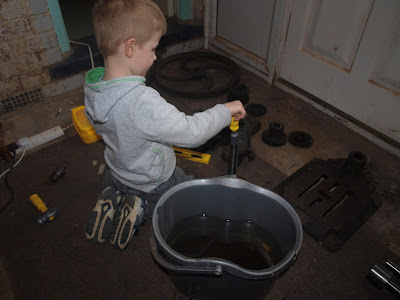
So although the workshop has been busy things have been very slow. Lenards been dealing with a few family issues and my wife is bed ridden at the moment so that leaves me to juggle my 3 year old boy and the work load on my jack jones. Not that I'm complaining the two loves in my life, the boy and restoration. So now it was just a case of compatability!! Luckly he loves fixing things to...

Dad... Dad... I'm fixing with you... Dad... look I'm fixing it for you...
So while he was occupied I carried on with the pieces that I had on the go. There a lot of considerations on a restoration like this. The drill originally had a brushed steel finish but after decades of rust and pitting it is proving to be a painfully slow task!

To restore this drill I have to take into account that there isn't much play in the parts and over cleaning would ruin the fittings as they are engineered to fit perfectly. So digital calipers in hand I set to work.

Nothing less than perfect will do so this may look clean it's not good enough. Time to polish out the part.

The difference is evident straight away and this part will stand out when I get to re-assembly.

The tolerances have been met and the parts are divided up into Prep, Polish and paint. I am really looking forward to seeing this item finished. I think that it will look awesome.

Dad... Dad... I'm fixing with you... Dad... look I'm fixing it for you...

So while he was occupied I carried on with the pieces that I had on the go. There a lot of considerations on a restoration like this. The drill originally had a brushed steel finish but after decades of rust and pitting it is proving to be a painfully slow task!

To restore this drill I have to take into account that there isn't much play in the parts and over cleaning would ruin the fittings as they are engineered to fit perfectly. So digital calipers in hand I set to work.

Nothing less than perfect will do so this may look clean it's not good enough. Time to polish out the part.

The difference is evident straight away and this part will stand out when I get to re-assembly.

The tolerances have been met and the parts are divided up into Prep, Polish and paint. I am really looking forward to seeing this item finished. I think that it will look awesome.
Tuesday 1 May 2012
Bradson Pillar Drill No.29 Breakdown
After much effort the drill was finally stripped down and we could begin looking at the damage and wear.
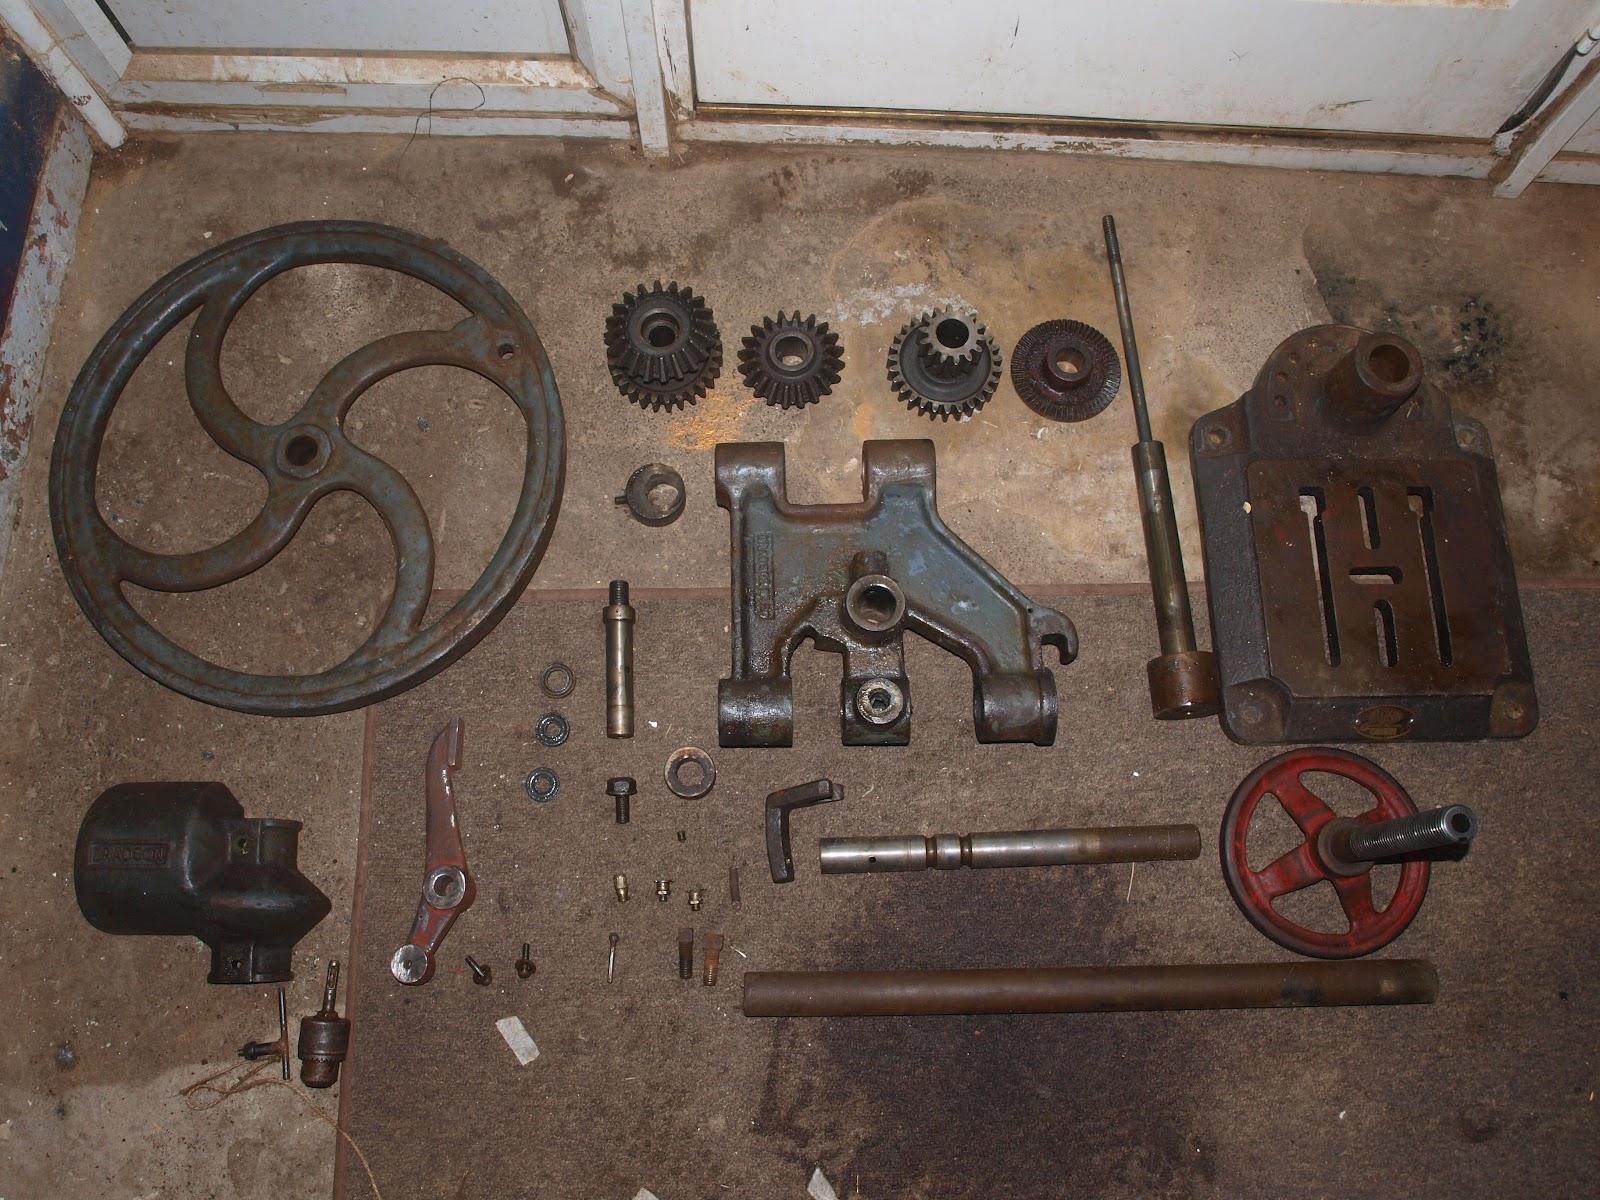
All the castings are in good order albeit corroded. The gears were seized but the teeth are complete with no signs of wear, but the bearings are shot and the handle is split and worn. So the first job is cleaning and testing the parts. Original parts are the best, but we had to be sure because fabricating parts is time consuming and costly.

So while Lenard did his 1940's house wife impression I broke out our new toy...

But the fun wasn't to last as our latest purchase died... So it's back to the shop tommorow!!!

While Lenard was neck deep in gummed up parts I stripped and fixed the handle, Then is used wood dye to bring some colour back to the piece, finally I finished it off with extra hard clear coat. The concurrent activity was preparing the metal handles for primer and paint. The nuts and bolt were cleaned ready for polishing.Monday 30 April 2012
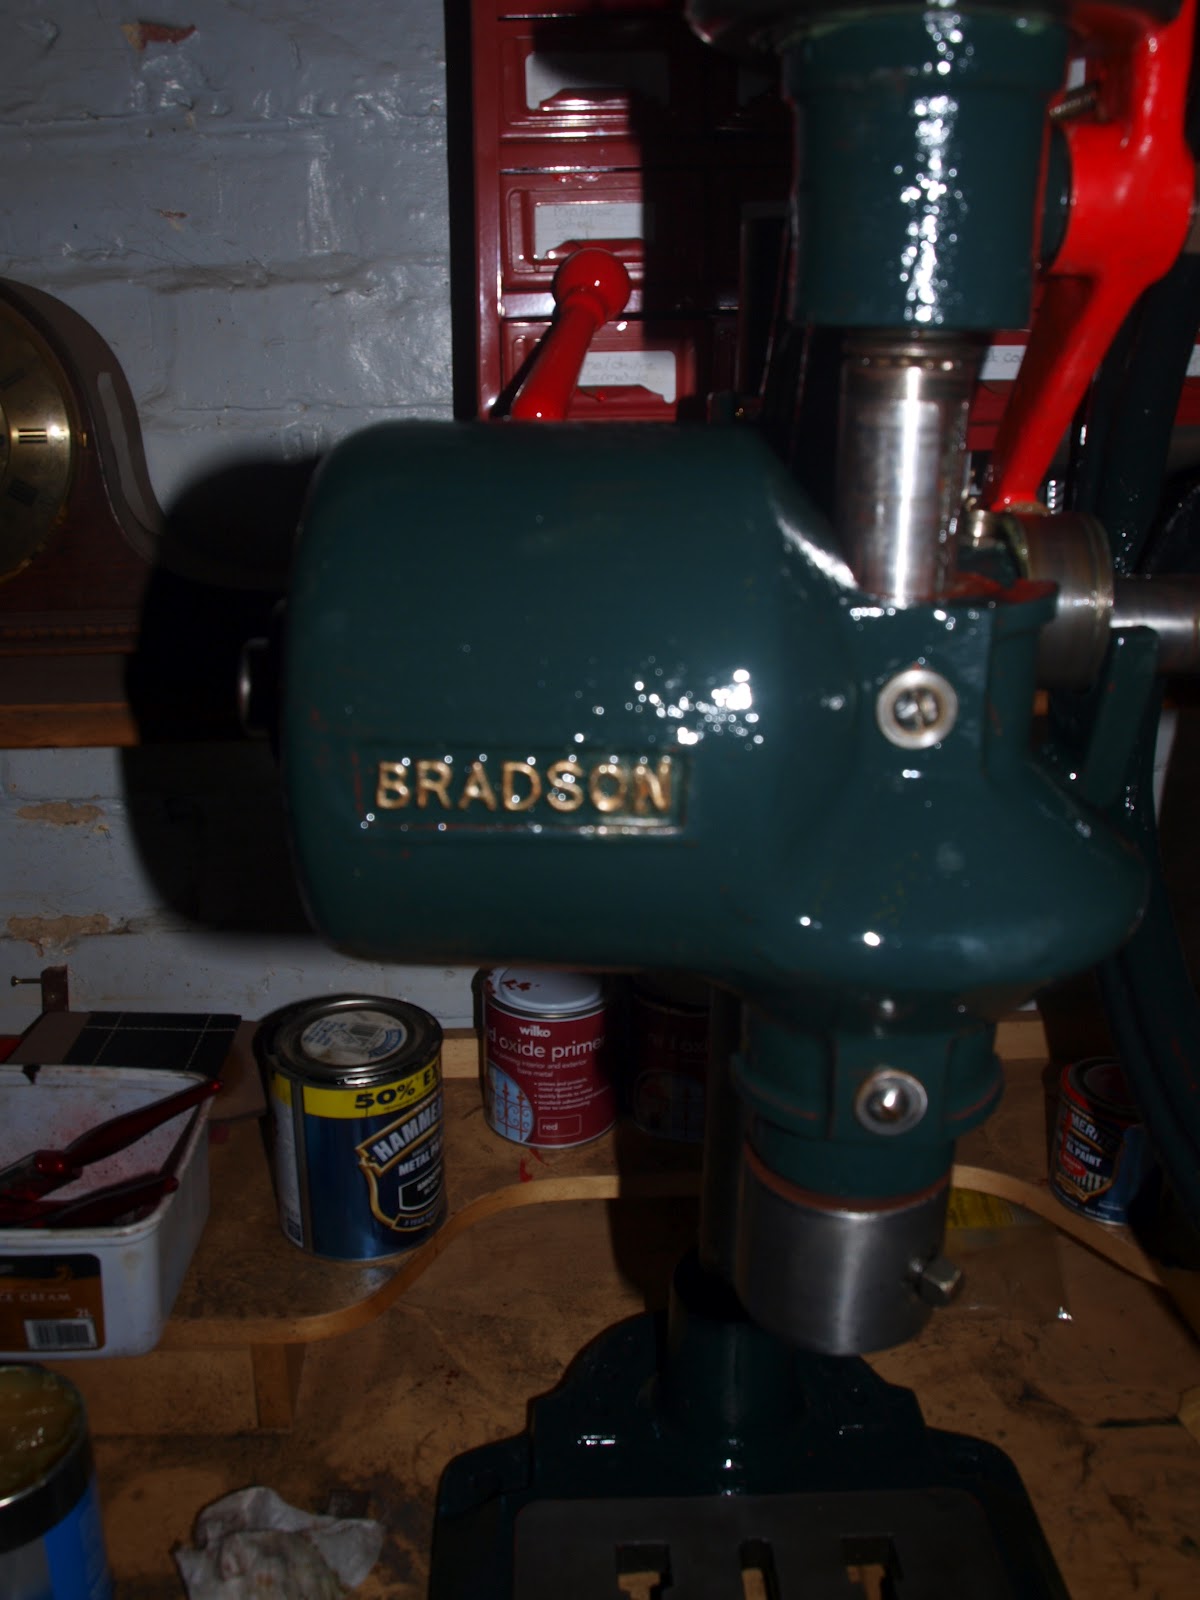
Bradson Pillar Drill No.29
So the next project is a vintage Bradson pillar drill. These things are heavy but they were made to last! As with a lot of the projects that come into the workshop they don't work and are usually in pieces. The Bradson is no exception... This is an infill piece and has no owner so we need to turn this project around very quickly to make a profit. Our objectives are simple make it work and make it look awesome...


At least it has a chuck and key!


So on this project Lenard will be taking the lead as it's right up his street. The good thing about a project like this is that worst case, we can put it to good use in the workshop.
Before I close this post I would like to mention my friend Pete McB who is a Photoshop Ninja and thank him for our header picture. Pete does a lot of Photoshop work and can accommodate most projects big or small. So if you need a Photoshop Ninja and you don't know who to call... Well you get the idea! Here is his contact info: http://www.facebook.com/petemcb

So this is the sum total of what we have to work with...

At least it has a chuck and key!


So on this project Lenard will be taking the lead as it's right up his street. The good thing about a project like this is that worst case, we can put it to good use in the workshop.
Before I close this post I would like to mention my friend Pete McB who is a Photoshop Ninja and thank him for our header picture. Pete does a lot of Photoshop work and can accommodate most projects big or small. So if you need a Photoshop Ninja and you don't know who to call... Well you get the idea! Here is his contact info: http://www.facebook.com/petemcb
Piano Odyssey Continued...
So it's 09:27 and the piano is now at it's new home awaiting the arrival of it's proud new owner!
As you can tell the client was very happy with the finished product.
The piano waxed up for transport.


I like to wax the wood before packaging and transportation as an extra layer.

This has been a really good restoration project and it's nice to see a bit of history saved. I hope that it's new owners enjoy it for many years to come.
I have to mention Carl the removals bloke. He is by far the most professional and reliable removals expert in the county that I have come accross and his prices are excellent! I have listed his contact details, as he really will move anything!!
MAN WITH VAN
Courier Services
Carl
Tel: 07812247501
E-Mail: carld1967@yahoo.co.uk
Well onto the next project...
Sunday 29 April 2012
Piano Odyssey
I know that I said "Monday" for an update but it would be one really long post! So I have decided to divide it in half...
Once we were satisfied that all of the pieces married up right it was STICKING TIME!!!

A point that is note worthy: Pianos have HUGE screws.


No problems.

Kick board in place...

The guts are back in and every key works beautifully.

The back is just as important as the front so we re-upholstered the back of the piano.

This needed to be done before paint to hide the new wood and nails...

Preparation is everything and should not be taken lightly.

Watching paint dry. Like Lenard's jokes?!!!

The piano is on the home straight and the clients are on their way round for a pre-delivery inspection and I don't mind saying "that I am a bit anxious". Find out tommorow if it all went well!!
Subscribe to:
Posts (Atom)