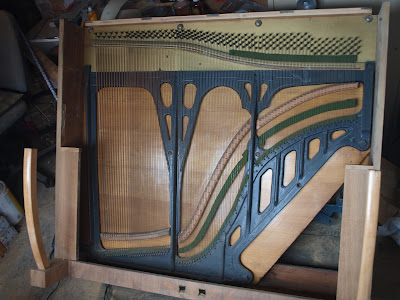
We are currently half way through a piano restoration for a music enthusiast who has decided that it is time to pick up the reigns again. Unfortunatly we had no designs on writing a blog when we committed to this job, otherwise we would have done a step by step process with photos! So with the few pictures that we currently have we will walk you through our work.
This piano had heavy scratches in the woodwork and some pretty big chunks of vaneer missing. The back had been destroyed, but the internals were in good working order. The casters were smashed and the keys were crooked. The restoration had been detailed out specifically by the client and would include some new decals, vaneer repair, clear coat, key levelling, strip, clean and wax. The most important part of any job for us is the wow factor from the client. A job is successful if the client is awestruck by our work!
Introduction...
Workshop Staffing!
This is Nathan, my best friend (better known as Lenard not Leonard!)
He is a skilled metal worker and sprayer, with years of mechanical and bodywork experience in the car industry.My name is Anthony better known to Lenard as Turbo because of his Ex, who was a bit slow! (she meant Rambo as I was in the Army???).
So back to the piano...
After the initial assement and instructions from the client we had to strip the piano down and begin work. The picture below shows the piano after we had sanded it, repaired the vaneer and had begun the re-assembly.
The body of a piano experiences many stresses over it's life, one of our jobs was to level out the panels so that everything was flush.
We are planning to finish the piano this weekned so please check back on Monday for an update...


No comments:
Post a Comment